Guide
How to Register as a Real Estate Broker or Agent on EspasyoMLS
Updated 2026-09-15
Quick answer
To register as a real estate broker, salesperson, or agent on EspasyoMLS, sign in with Google and choose Realtor, open the Trust Center from your dashboard, complete the Edit Agent Profile sections (photo and personal details, address and RESA credentials, professional details and specializations, service areas, and ID documents), tap Save Changes, then Submit for Verification. An admin reviews your PRC credentials and you are notified once your profile is verified.
This guide is for licensed real estate brokers, salespersons, and agents in the Philippines who want to join EspasyoMLS as verified listing professionals. The whole registration is done on your mobile phone in one sitting, and every step below matches the screens you will see.
Before you start, prepare the following: your Google account for signing in, your PRC license details (license number and expiry date) as printed on your license, a valid government-issued ID such as a passport or driver's license, and one proof of address such as a utility bill, bank statement, or lease agreement. Have clear photos of these documents ready, since uploads are limited to JPEG, PNG, and PDF files of up to 5MB each.
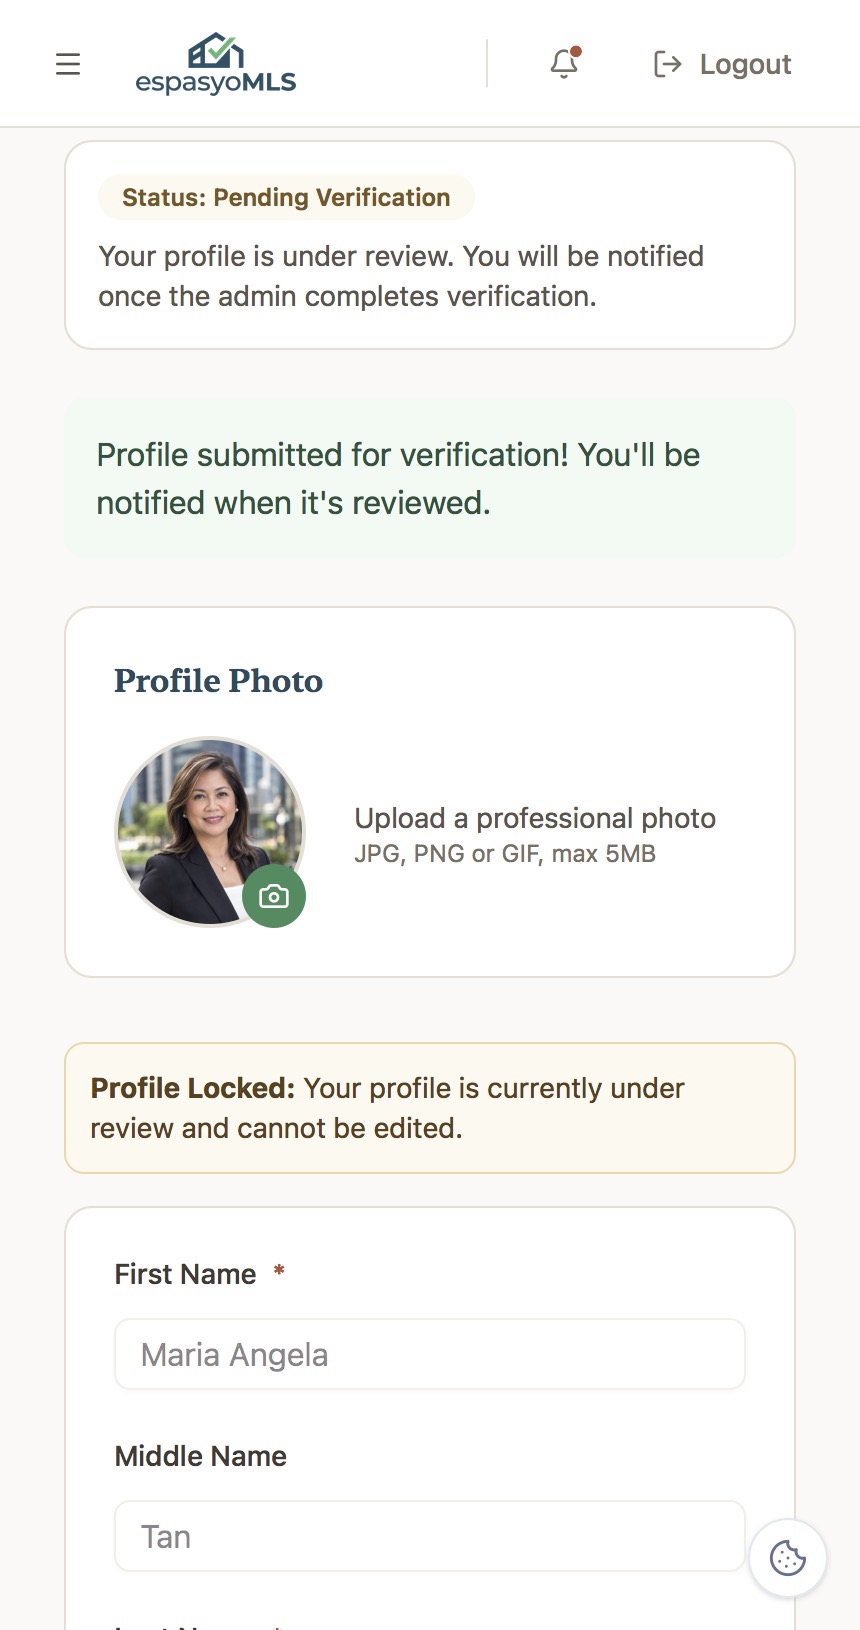
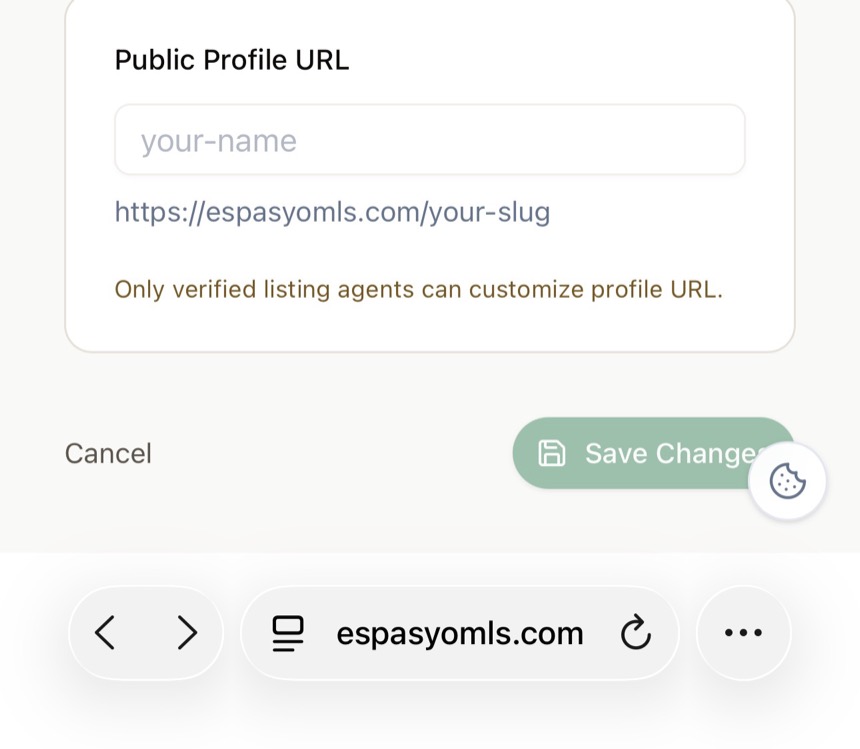
After you submit, your profile enters Pending Verification while an admin reviews your documents. Verified agents get a public profile with a customizable URL and can start publishing listings. If anything needs correction, your profile is returned with the specific reasons so you can fix it and resubmit.
Step-by-step registration on your phone
Create your account
Open espasyomls.com on your phone and tap Signin or Register. Choose Continue with Google, pick your Google account, then choose Realtor when asked for your account type. You will land on your agent dashboard, ready for the next step.
Open the Trust Center from your dashboard
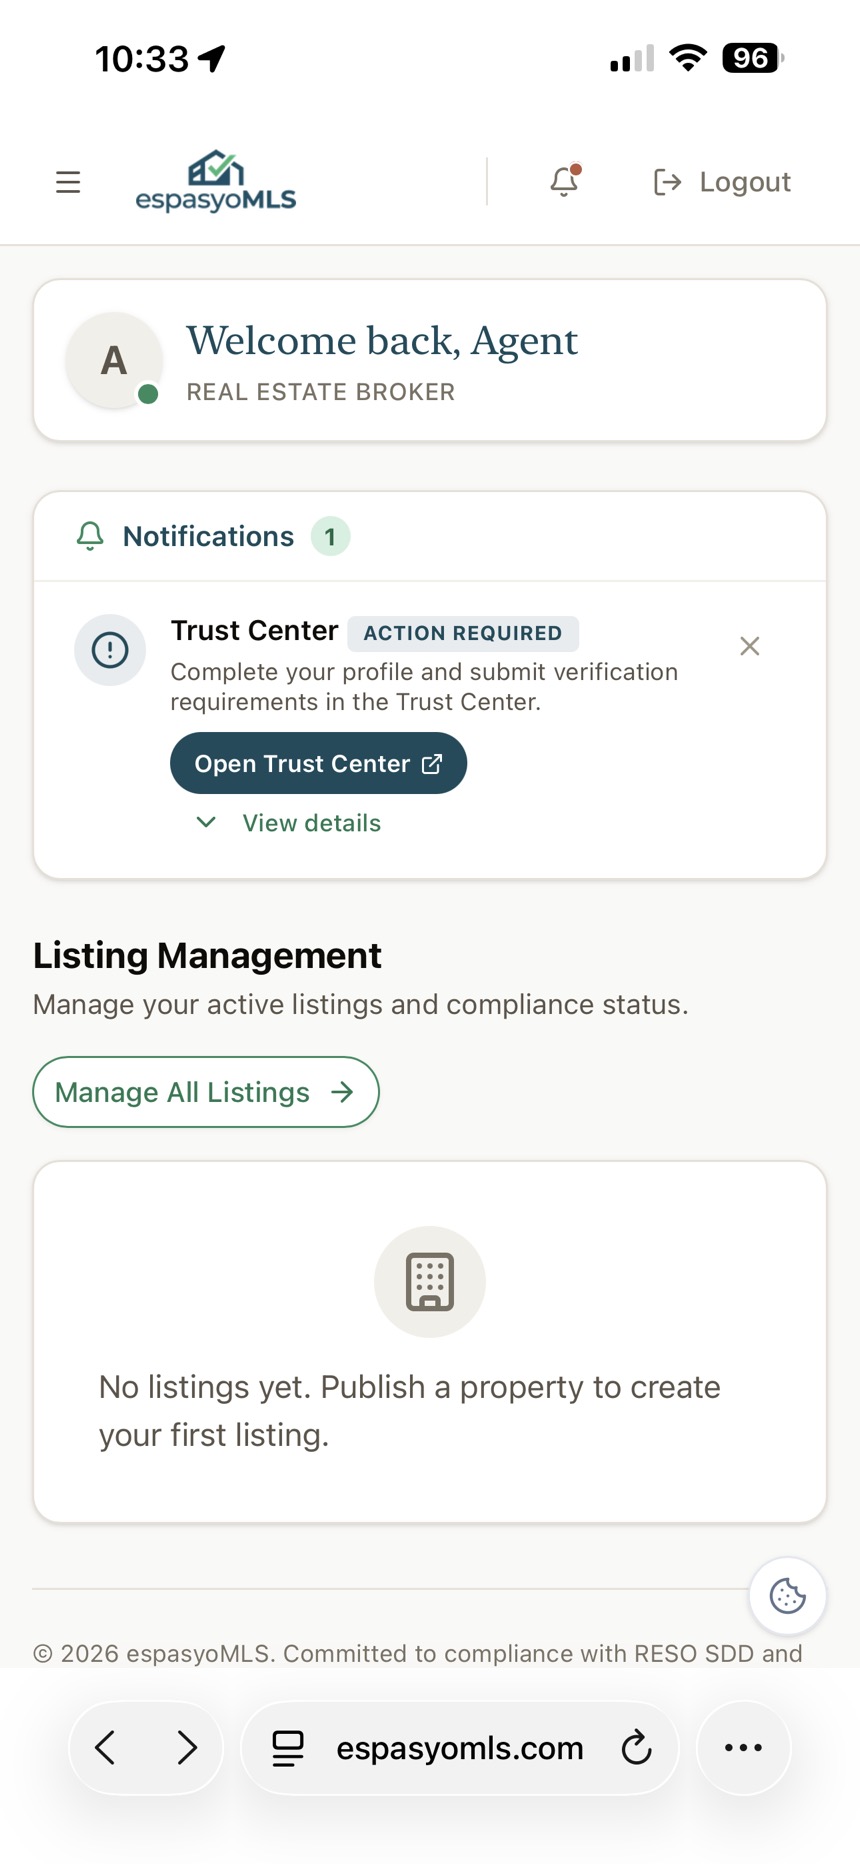
Right after signing in, your dashboard shows a Trust Center notification marked ACTION REQUIRED. Tap Open Trust Center to go straight to your Edit Agent Profile page. If you closed the notification, you can reach the same page anytime through the Trust Center entry in your dashboard menu.
Get to know the Edit Agent Profile page
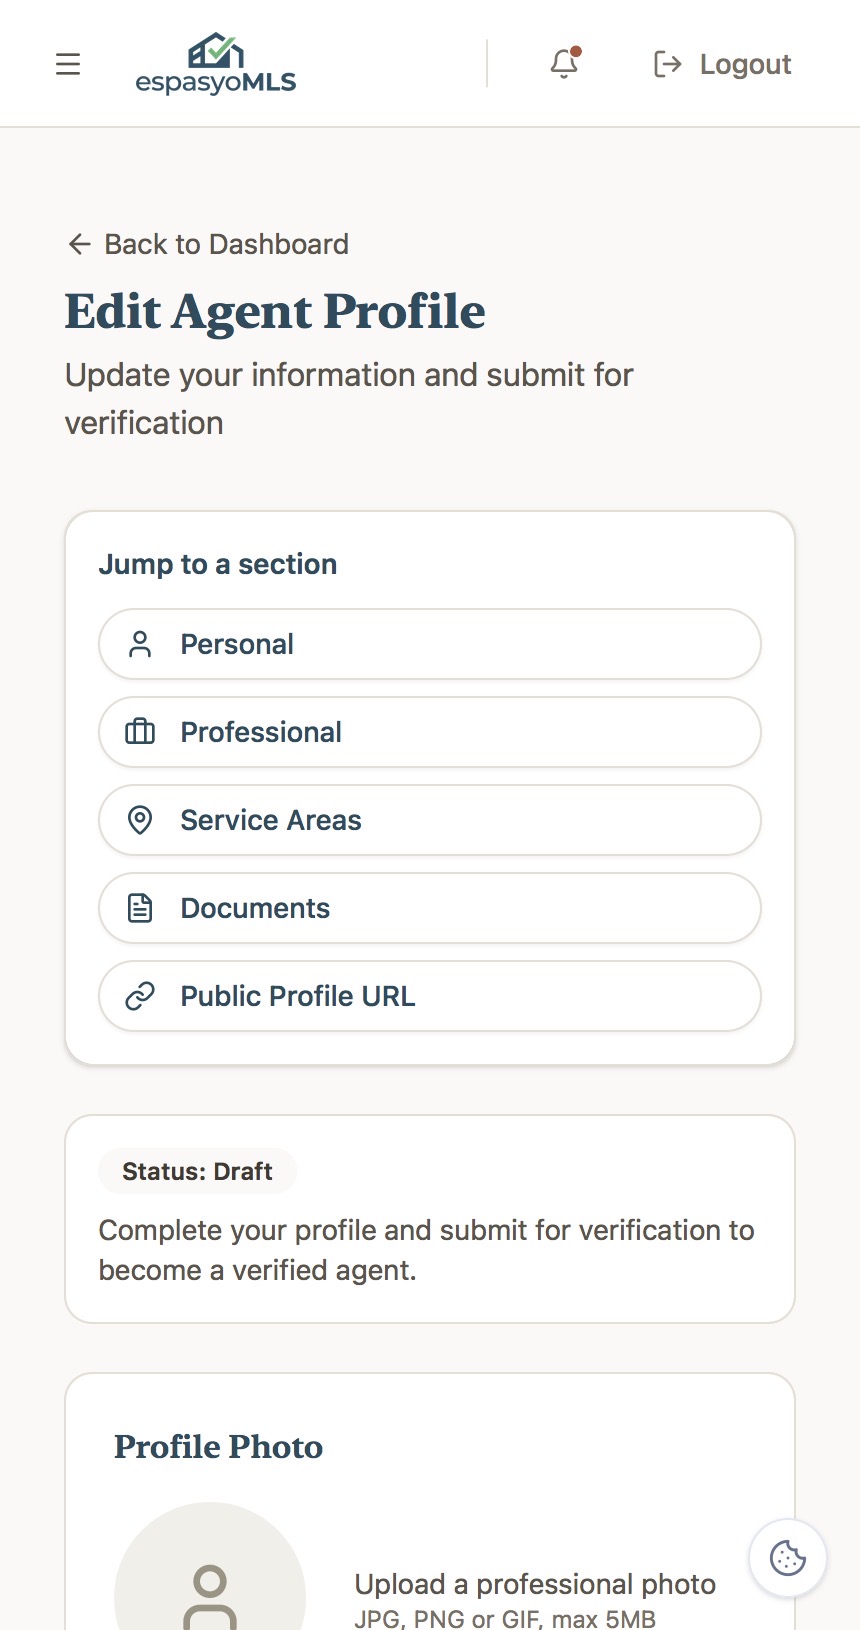
Your profile starts in Draft status. The Jump to a section row lets you move quickly between Personal, Professional, Service Areas, Documents, and Public Profile URL. Keep an eye on the Ready to Submit card near the bottom — it lists exactly what is still missing before you can submit.
Add your photo and personal details
In the Personal section, tap the camera icon on the photo placeholder to upload a professional profile photo (JPG, PNG, or GIF, up to 5MB). Fill in your first name, last name, and mobile number. A short bio is optional, but it helps potential clients understand your experience and expertise.
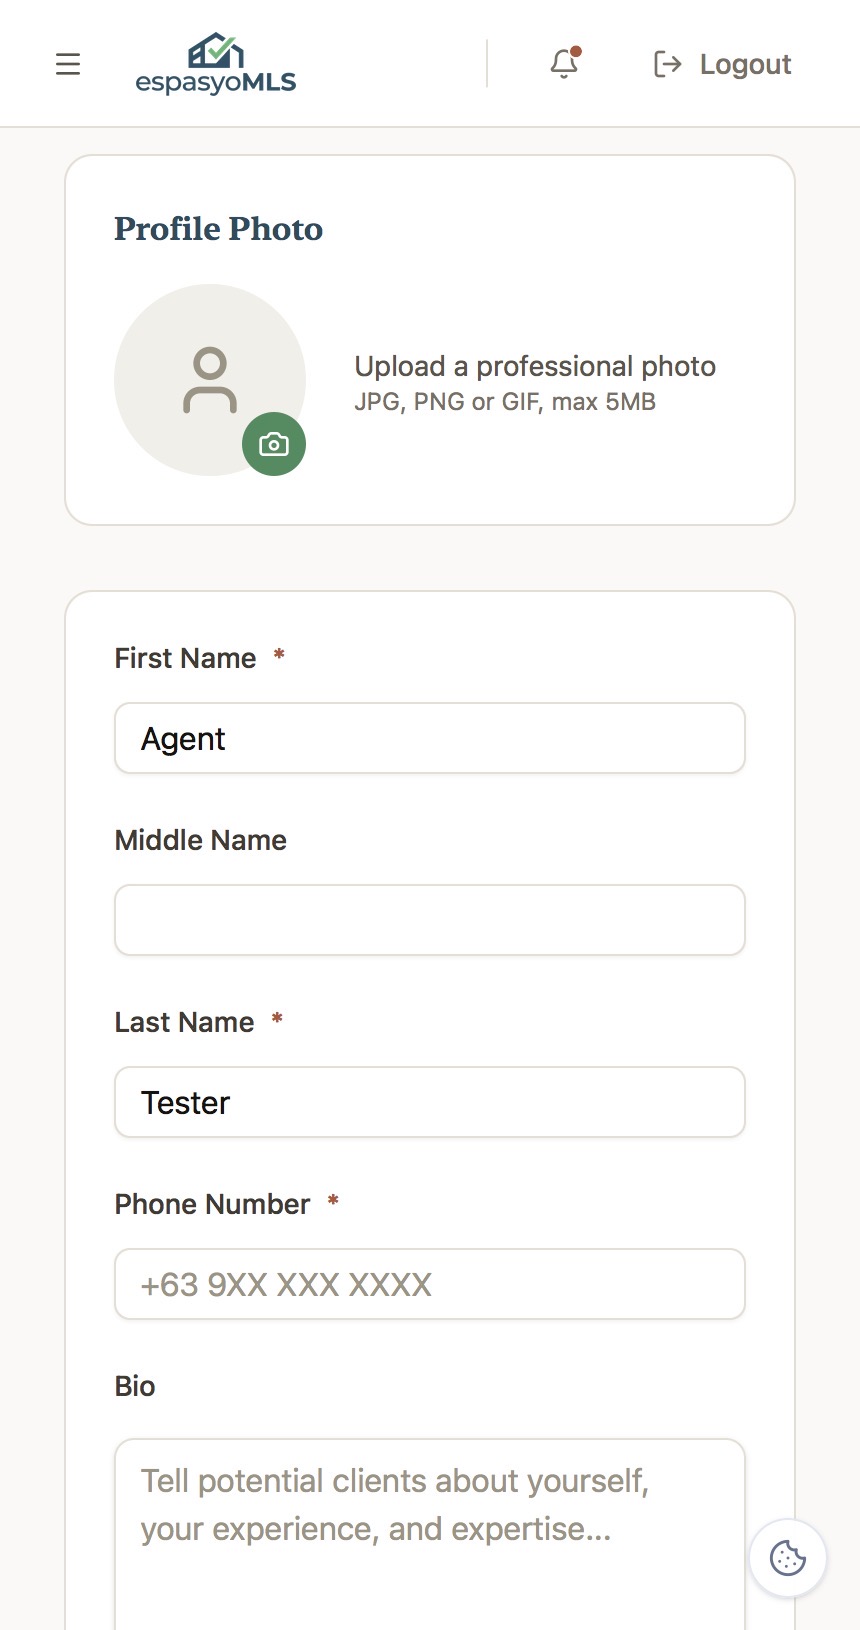
Enter your barangay address and RESA credentials
In the Address field, search for and select only your barangay — not your full street address — and make sure it matches the address on the ID you will upload. Then set your agent type (for example, Real Estate Broker) and enter your PRC license number and license expiry exactly as printed on your license.
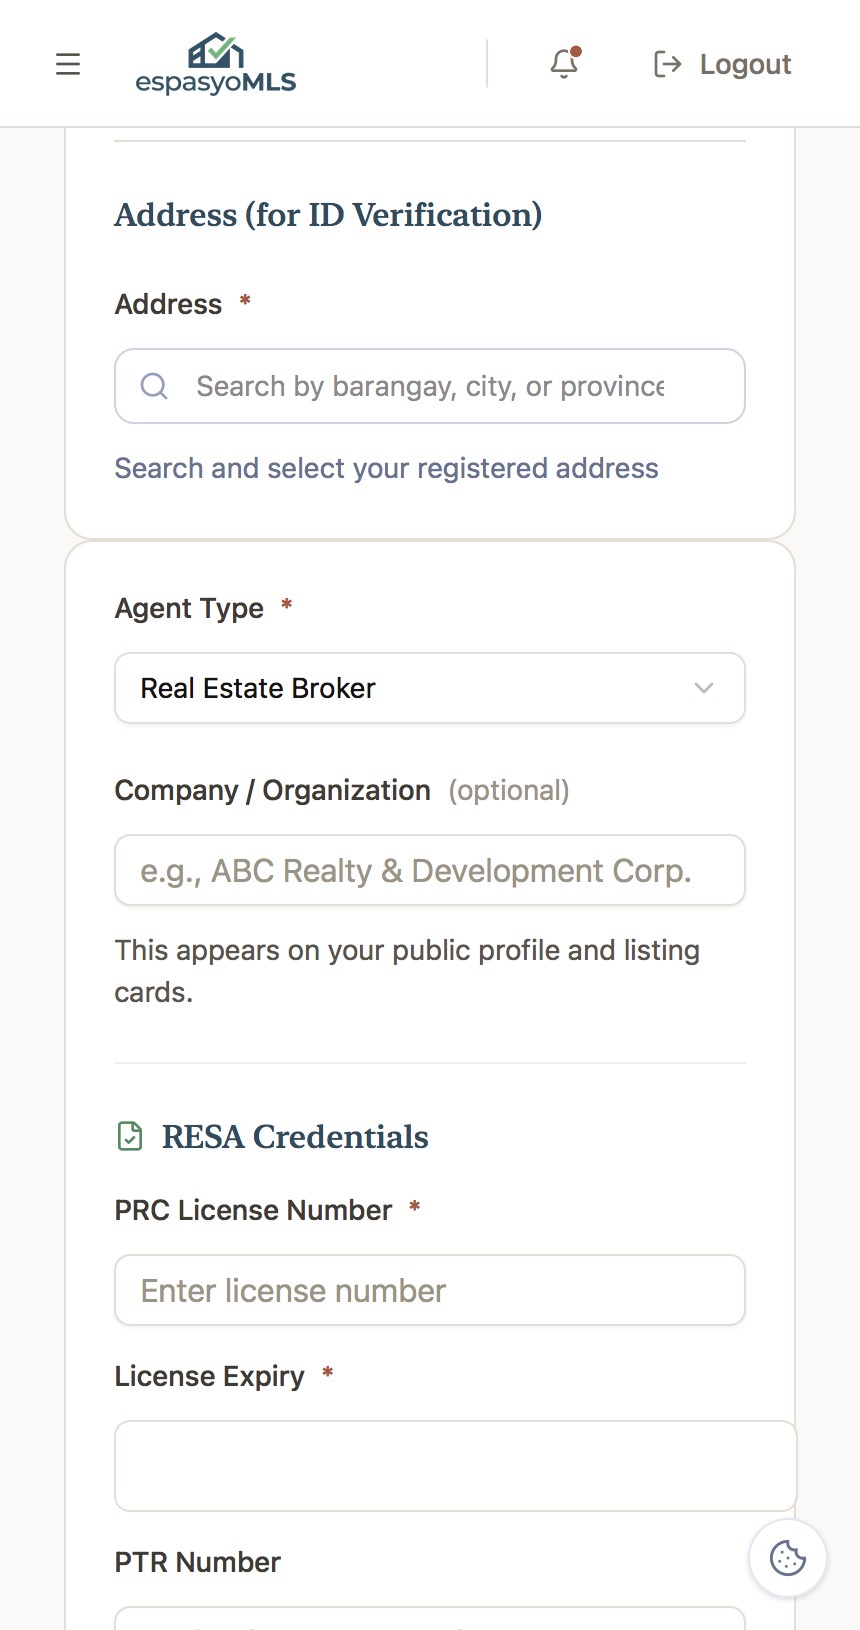
Complete your professional details and specializations
Add your PTR number, DHSUD registration number, and years of experience if you have them. Then tap at least one specialization chip, such as Residential or Commercial — at least one specialization is required before you can submit.
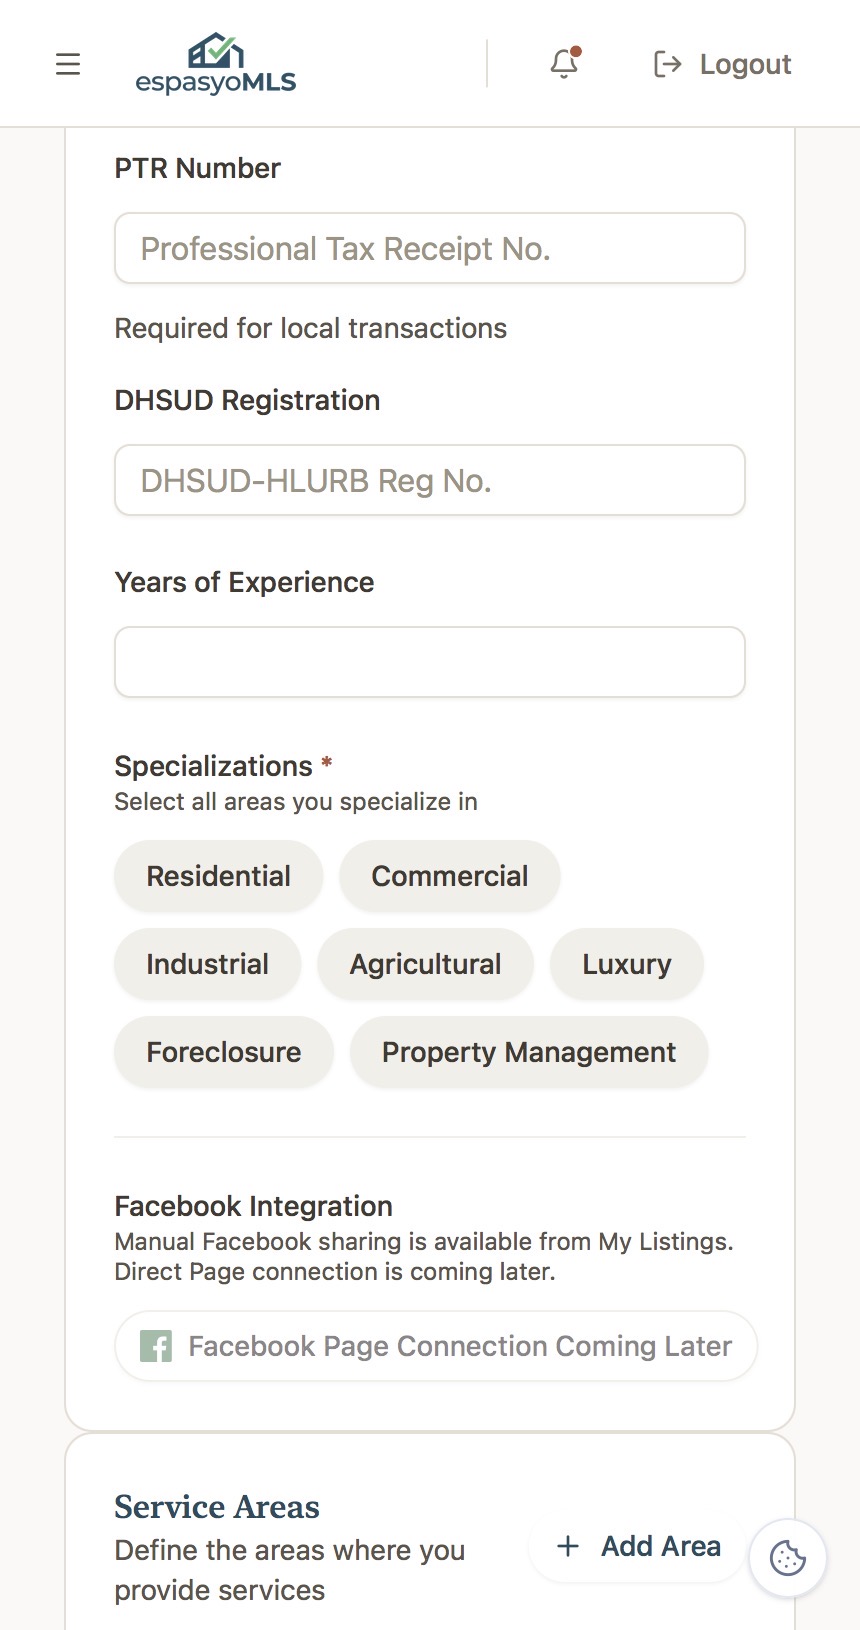
Add service areas and upload your IDs
In Service Areas, tap Add Area and choose at least one city or municipality where you serve clients. In the Verification Documents section, upload a clear photo of your PRC license or ID card and a valid government ID such as a passport or driver's license.
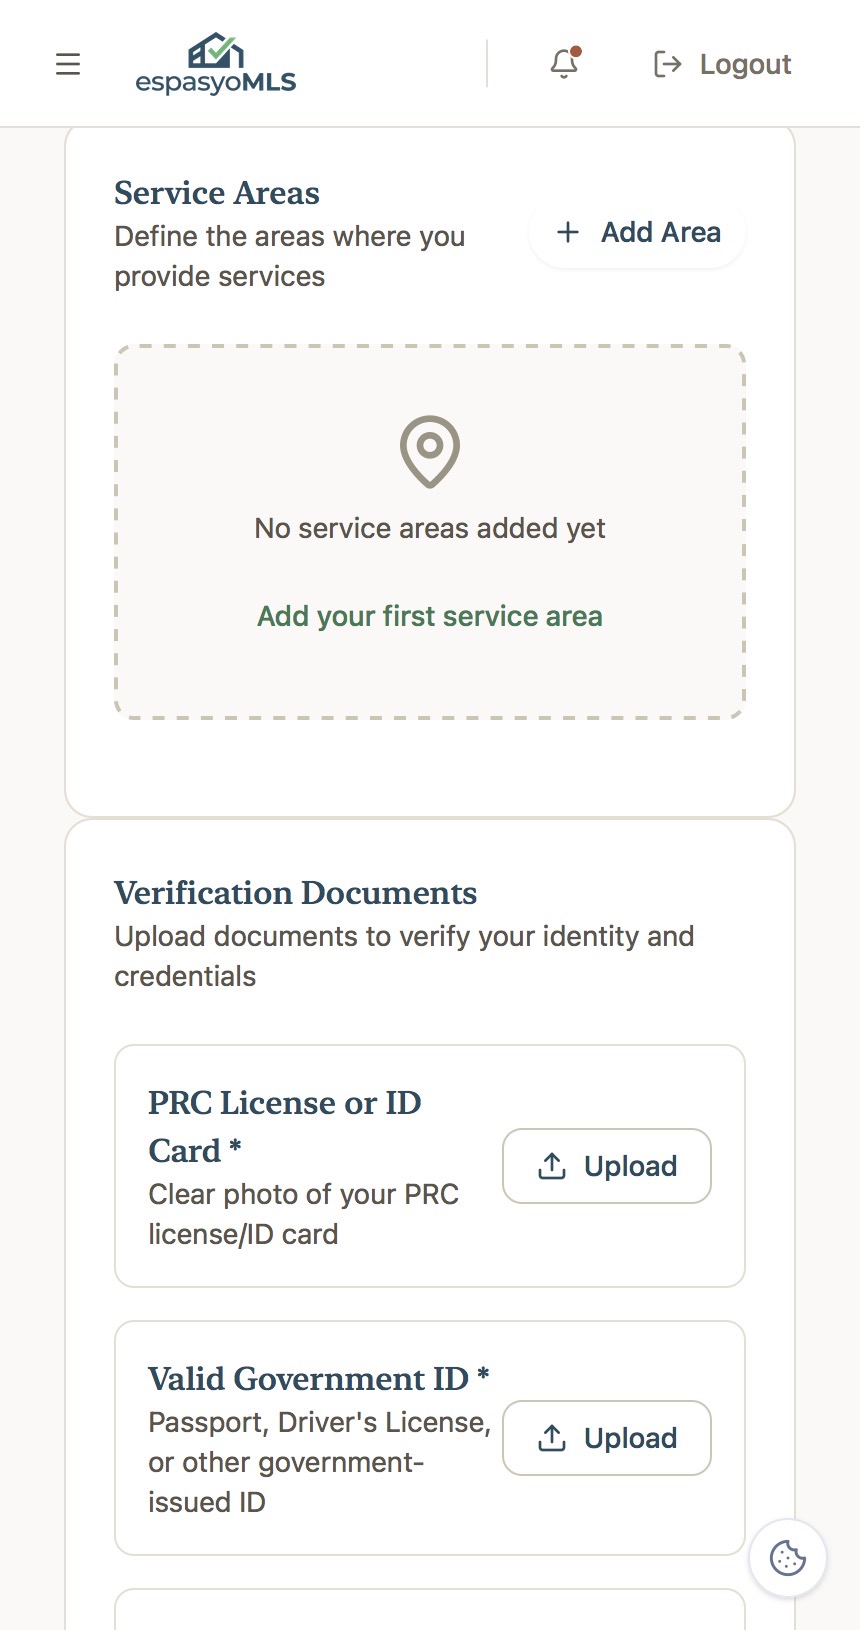
Upload proof of address and save
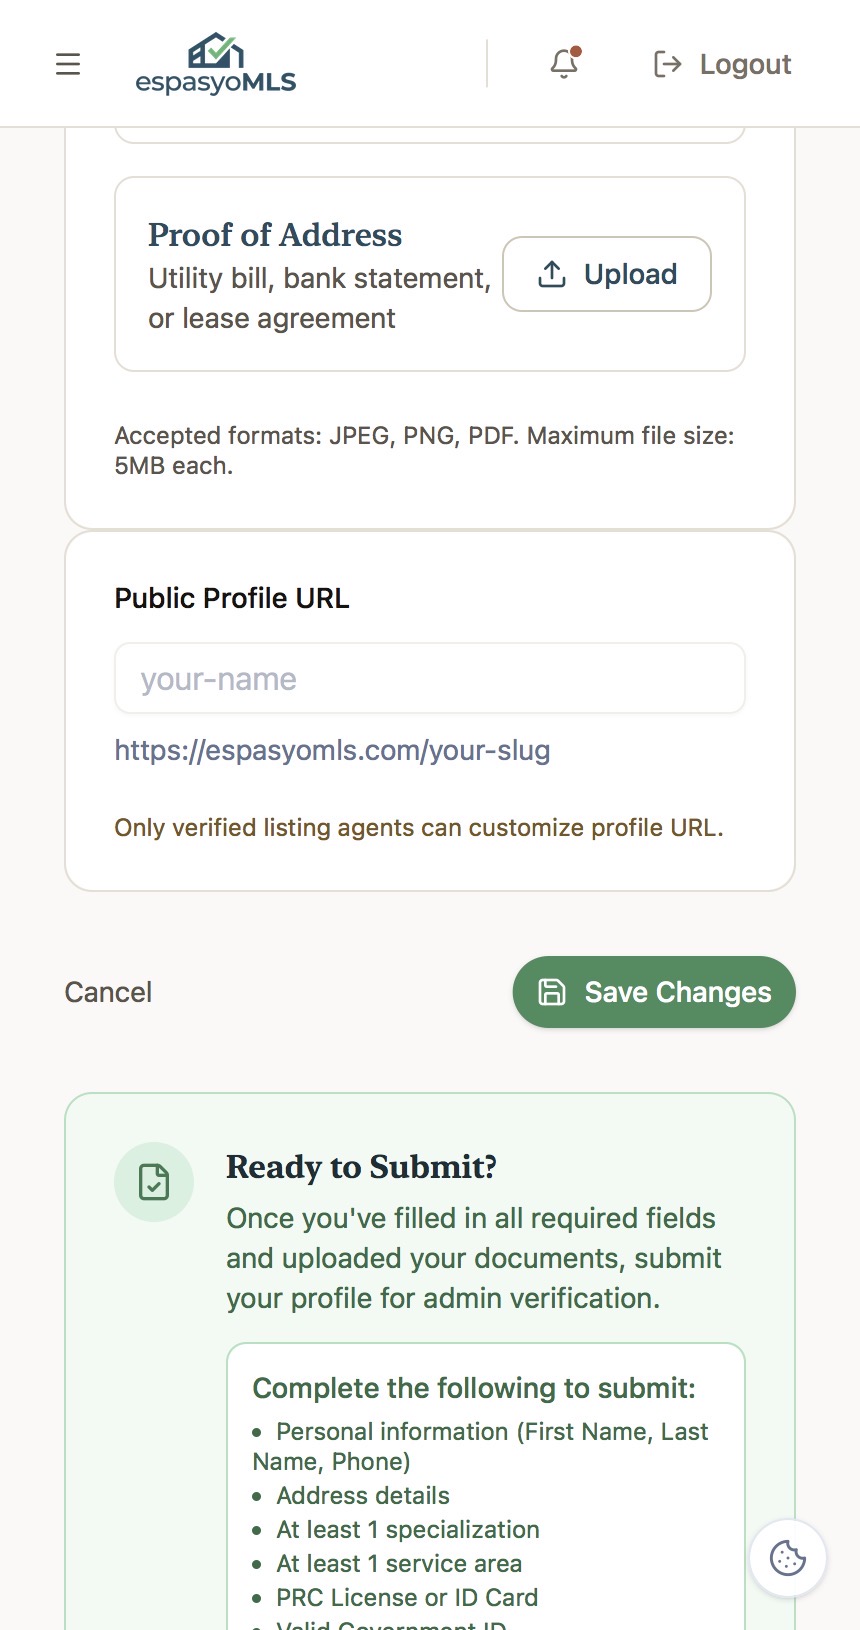
Upload one proof of address, such as a utility bill, bank statement, or lease agreement. Accepted formats are JPEG, PNG, and PDF, up to 5MB each. When every field is filled in, tap Save Changes at the bottom of the page.
Review the checklist and submit
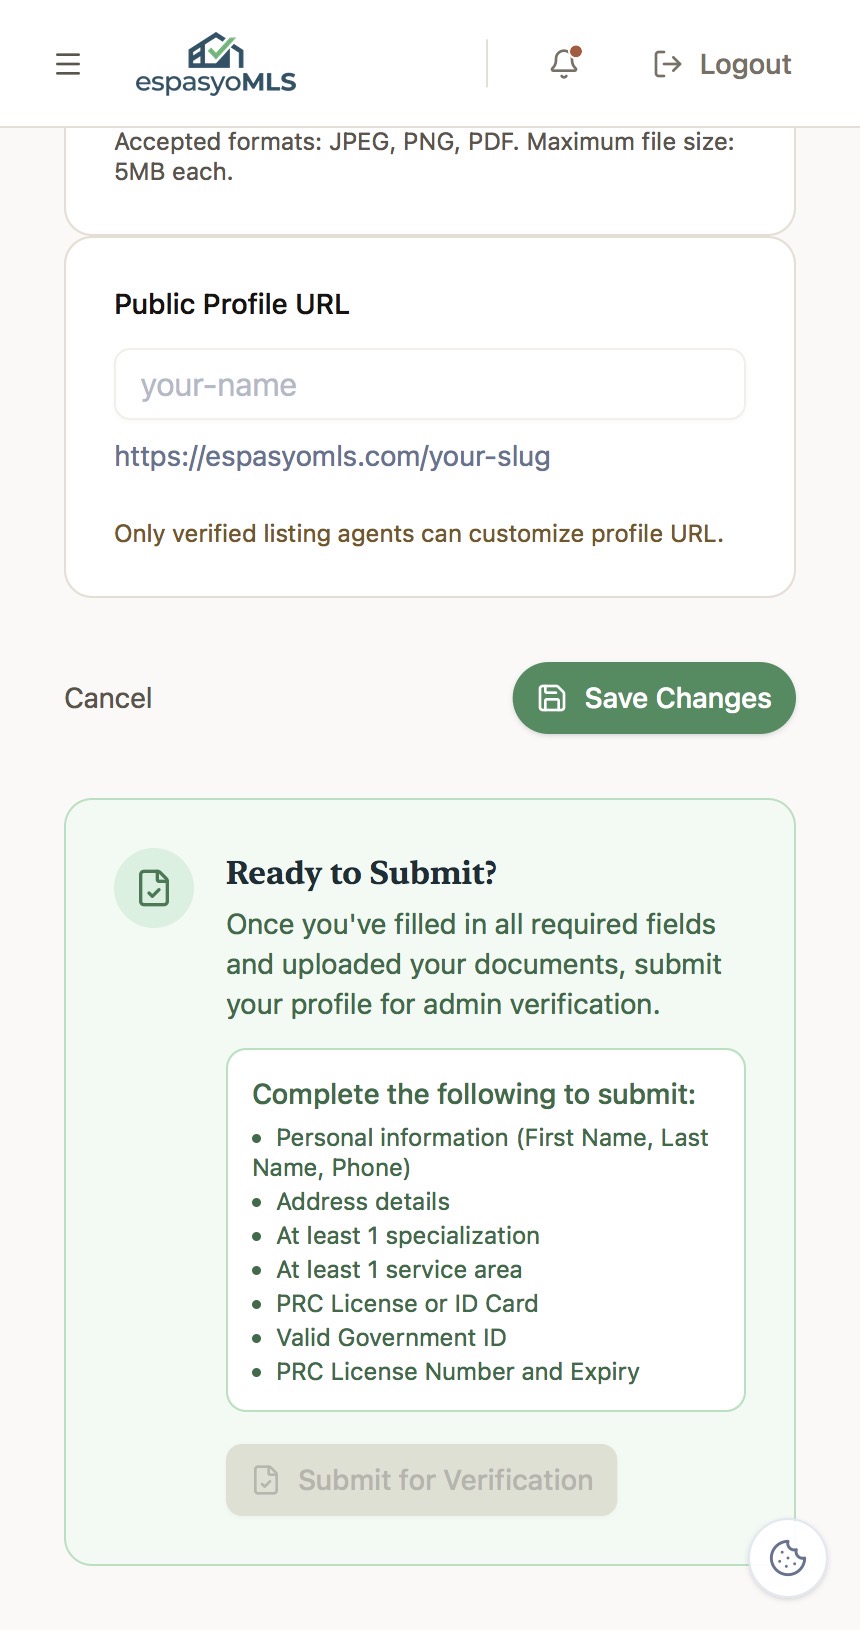
Scroll to the Ready to Submit card. It lists the remaining requirements: personal information, address details, at least one specialization, at least one service area, your PRC license or ID card, a valid government ID, and your PRC license number and expiry. Once every item is complete, tap Submit for Verification.
Wait for the review
Your status changes to Pending Verification and your profile is locked while the admin reviews your documents — the Save Changes button stays disabled on purpose. You will be notified when the review is complete. If anything needs fixing, your profile is returned with the specific reasons so you can correct it and resubmit.