Guide
How to Create a Property Listing on EspasyoMLS (Broker / Agent / Sales Agent Guide)
Updated 2026-09-20
Quick answer
To create a property listing on EspasyoMLS, open My Listings from your agent dashboard and tap Add Listing. Select the property type, enter the address (region, province, city or municipality, barangay, street, and house or lot number), and tap Search Property. When the registered property appears in the results, tap Create Listing. Fill in the listing title and description, choose the furnishing and transaction type, set the price in Philippine pesos, pick your listing authority, upload a signed Authority to Sell (ATS) and confirm the attestation, then add photos and tap Save & Review. On the review page, tap Publish Listing. The listing goes live and becomes visible in search results. EspasyoMLS admins review listings for due diligence, especially the Authority to Sell, to protect buyers, renters, and property owners.
This guide is for verified real estate brokers, agents, and sales agents on EspasyoMLS who want to create a listing for a property that has already been registered and approved by the admin. If you have not registered the property yet, do that first. The registration is a one-time event per property, and you can follow our register-property guide before coming back here.
Creating a listing is where the property starts earning for your client. Everything you enter here (the title, the description, the price, the photos) is what buyers and renters see in search results, so accuracy and honesty matter from the first field onward.
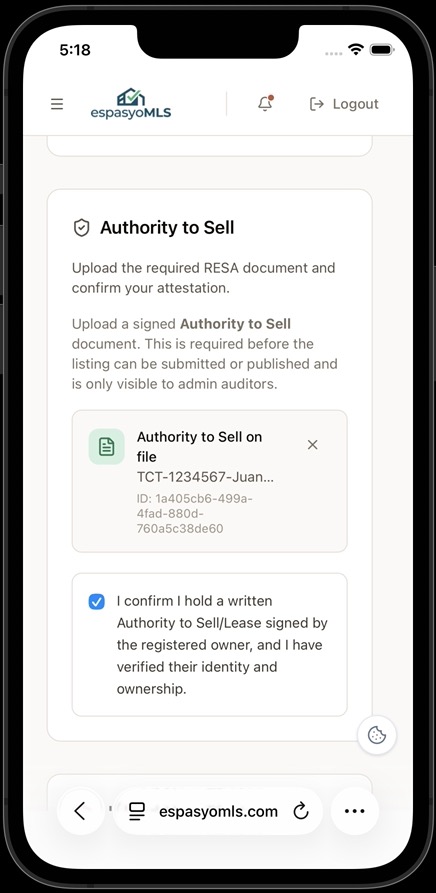
One requirement deserves special attention: the Authority to Sell (ATS). EspasyoMLS reserves the right to perform due diligence on every listing before and after it goes live, and the ATS is the most important document in that review. Upload a signed Authority to Sell document and confirm the attestation that you hold a written authority signed by the registered owner. Admin auditors can see this document, and listings without a valid ATS can be returned or taken down. This protects everyone: owners whose properties are marketed without permission, and buyers and renters who rely on the platform's integrity.
All the information collected while you create the listing is part of the platform's data integrity review. The checklist below lists exactly what you need to prepare before you start, so you can finish the listing in one sitting.
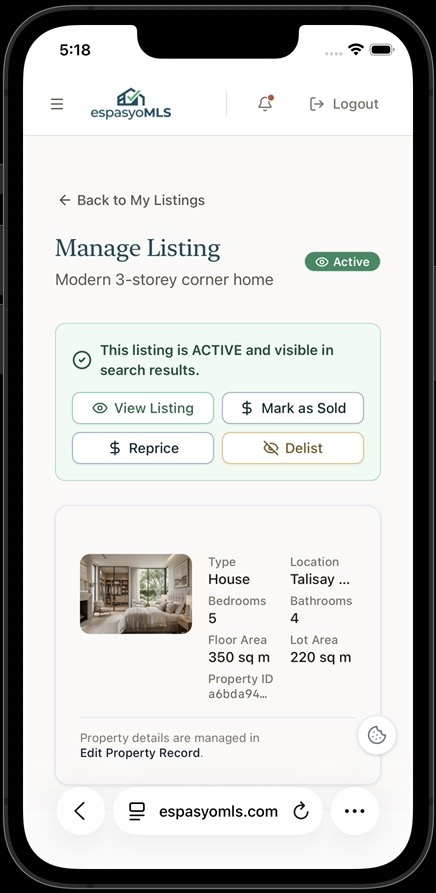
Once published, the listing becomes ACTIVE and visible in search results. You can then manage it from My Listings: view the public listing, reprice it, mark it as sold, or delist it when it is no longer available.
Before you create a listing, here's the information we collect
Listing details
- Listing title that describes the property
- Description that helps buyers understand what makes the property special
- Furnishing status (for example, Unfurnished, Semi-Furnished, or Fully Furnished)
- Optional property video link (YouTube or Vimeo)
Pricing and listing type
- Transaction type (For Sale or For Rent)
- Price in Philippine pesos (PHP)
- Listing authority type: Exclusive Authority, Non-Exclusive Authority, or Open Listing
Listing authority and due diligence
- Signed Authority to Sell (ATS) document, required before the listing can be submitted or published, and visible only to admin auditors
- Attestation confirming you hold a written Authority to Sell or Lease signed by the registered owner, and that you have verified their identity and ownership
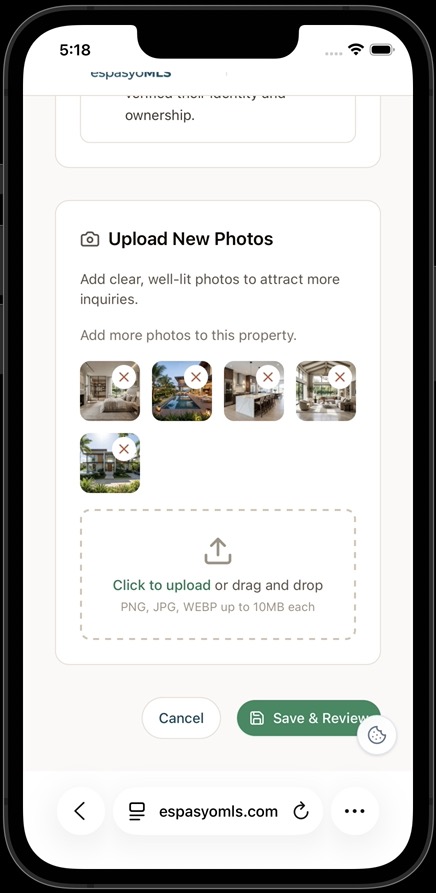
Photos to upload (PNG, JPG, or WEBP up to 10MB each)
- Clear, well-lit photos of every room and the exterior of the property attract more inquiries
Step-by-step registration on your phone
Open My Listings from your dashboard
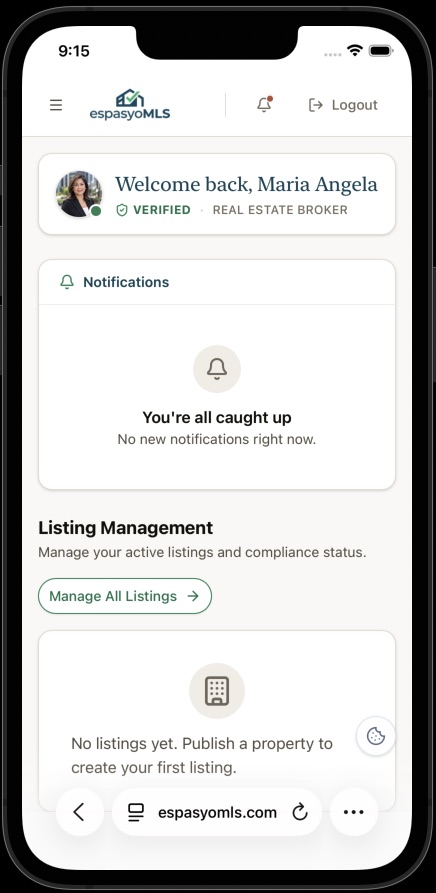
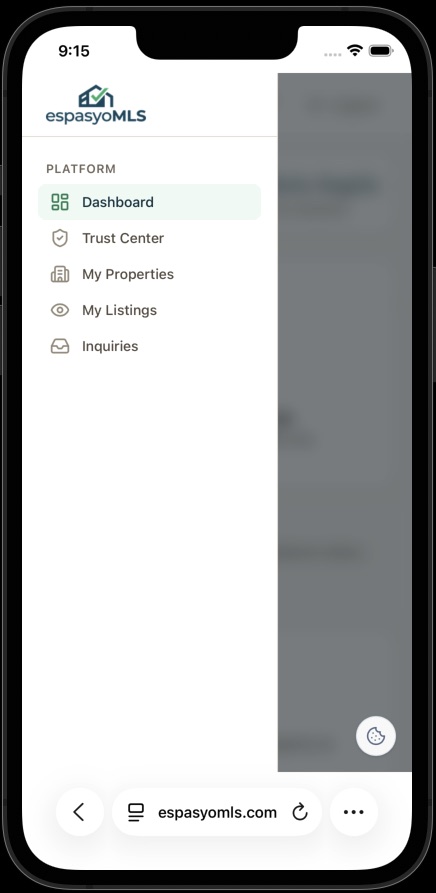
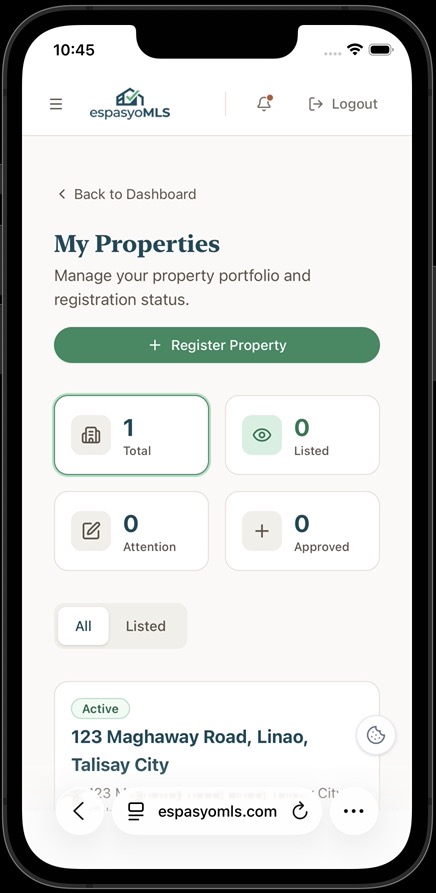
Sign in to espasyomls.com on your phone. Tap the hamburger icon at the top-left to open the side menu, then tap My Listings under Platform. Your listings page shows the Listing Management section with everything you have published so far. Tap the Add Listing button to start.
Select the property type
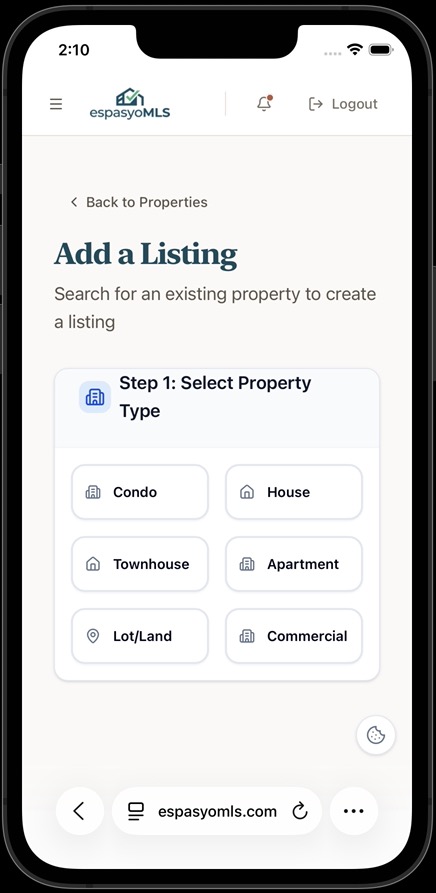
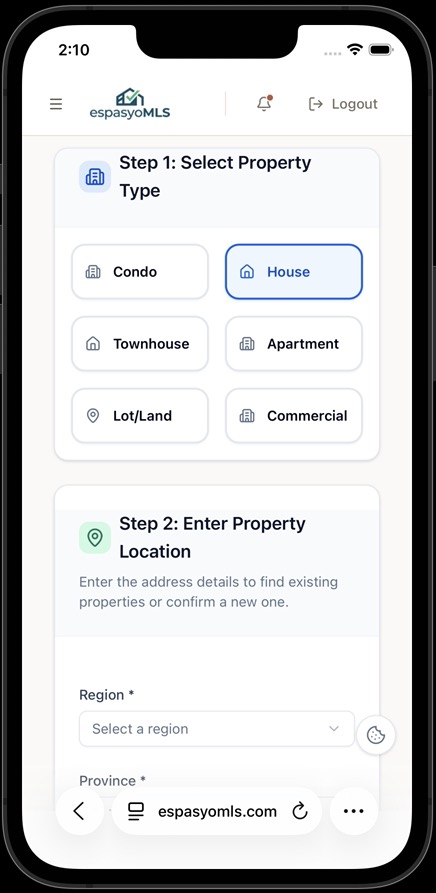
The Add a Listing screen opens, reminding you to search for an existing property to create a listing. In Step 1, tap one of the six property types: Condo, House, Townhouse, Apartment, Lot/Land, or Commercial. The type you tap is highlighted.
Select the region, province, city, and barangay
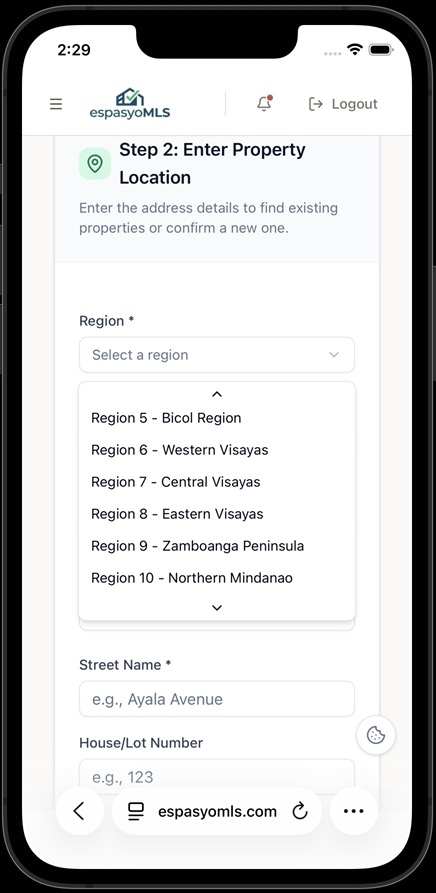
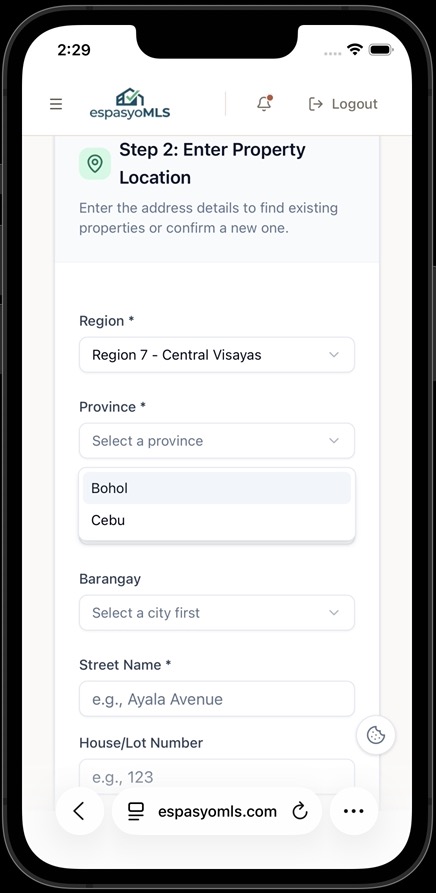
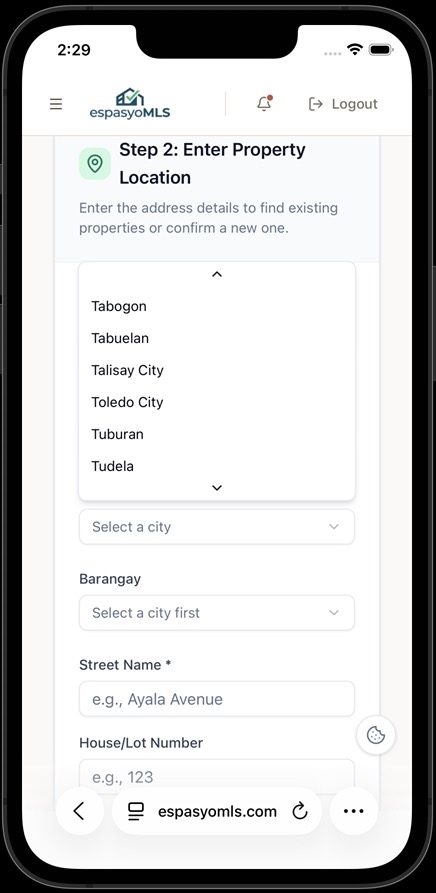
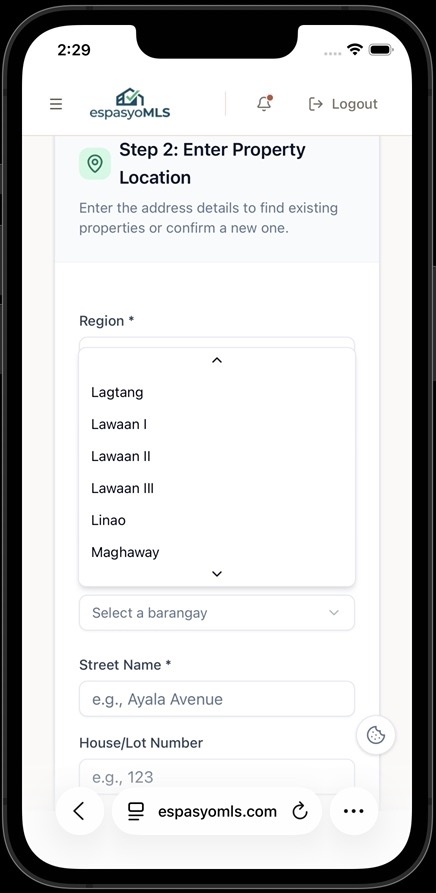
Step 2 asks for the property location so the system can find the registered property. Using the cascading dropdowns, select the region first, then the province, then the city or municipality, and finally the barangay. Each list narrows as you go: province choices depend on the region, and barangay choices depend on the city.
Enter the street details and search
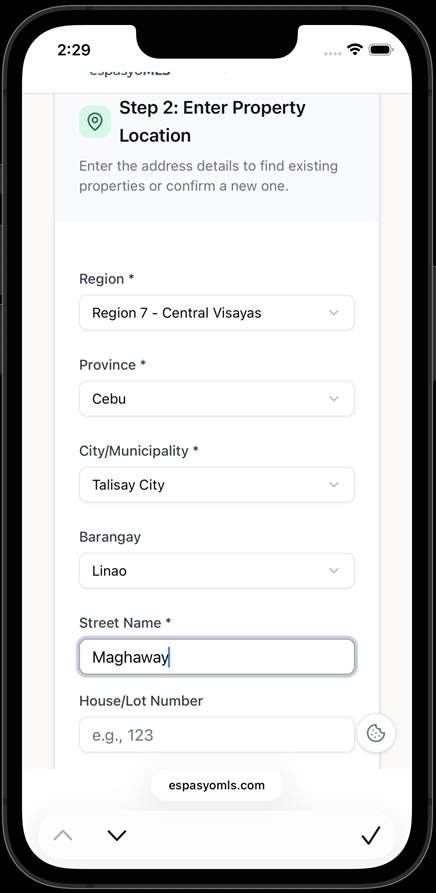
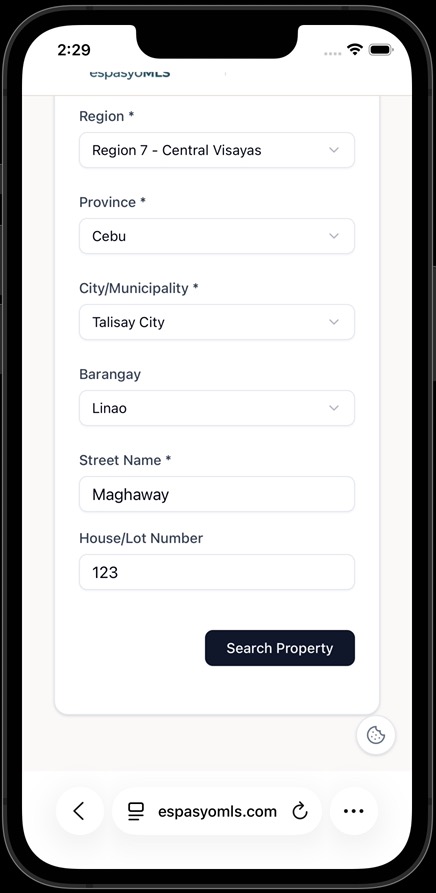
Type the street name (required) and the house or lot number if you know it. Then tap the Search Property button at the bottom of the form.
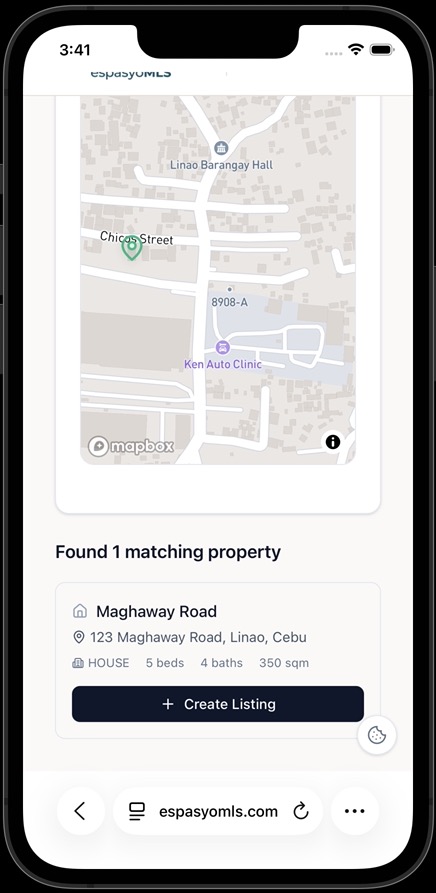
Review the search result and tap Create Listing
The results screen shows a map of the address area and any matching registered properties. When you see the property you want to list (the card shows its name, address, type, bedrooms, bathrooms, and floor area), tap Create Listing. If nothing matches, the property has not been registered yet: register it first using our register-property guide, then come back to this step.
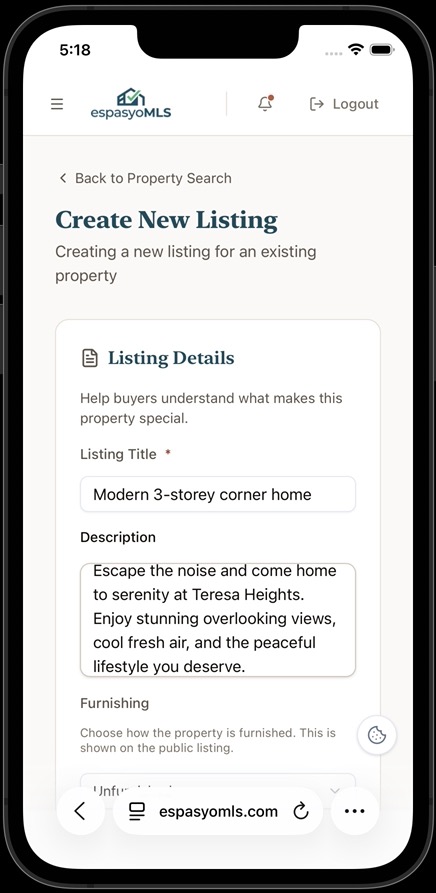
Write the listing title and description
The Create New Listing screen opens for the existing property. In the Listing Details section, enter a Listing Title that describes the property in a few words, and a Description that helps buyers understand what makes it special: the neighborhood, the views, the condition, and the lifestyle it offers.
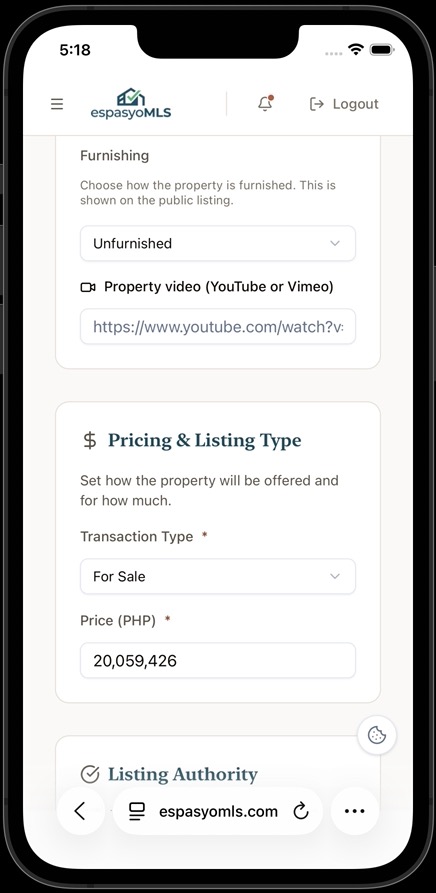
Set the furnishing, video, transaction type, and price
Choose how the property is furnished. This is shown on the public listing. Optionally paste a property video link from YouTube or Vimeo. Then, in the Pricing & Listing Type section, pick the Transaction Type (For Sale or For Rent) and enter the Price in Philippine pesos.
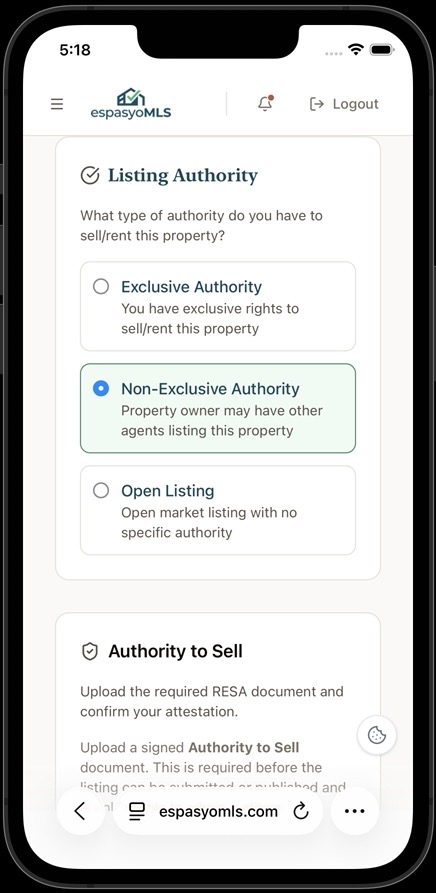
Choose the listing authority type
In the Listing Authority section, pick the authority you hold for this property: Exclusive Authority (you have exclusive rights to sell or rent it), Non-Exclusive Authority (the owner may have other agents listing it), or Open Listing (an open market listing with no specific authority).
Upload the signed Authority to Sell and confirm the attestation
The Authority to Sell section asks you to upload the required RESA document: a signed Authority to Sell. This is required before the listing can be submitted or published, and it is visible only to admin auditors. Then tick the attestation confirming you hold a written Authority to Sell or Lease signed by the registered owner and that you have verified their identity and ownership. EspasyoMLS admins perform due diligence on every listing, and the ATS is the heart of that review.
Upload photos and tap Save & Review
In the Upload New Photos section, add clear, well-lit photos (PNG, JPG, or WEBP up to 10MB each) to attract more inquiries. You can add as many photos as you need and remove any you change your mind about. When everything is filled in, tap Save & Review.
Review the draft and publish
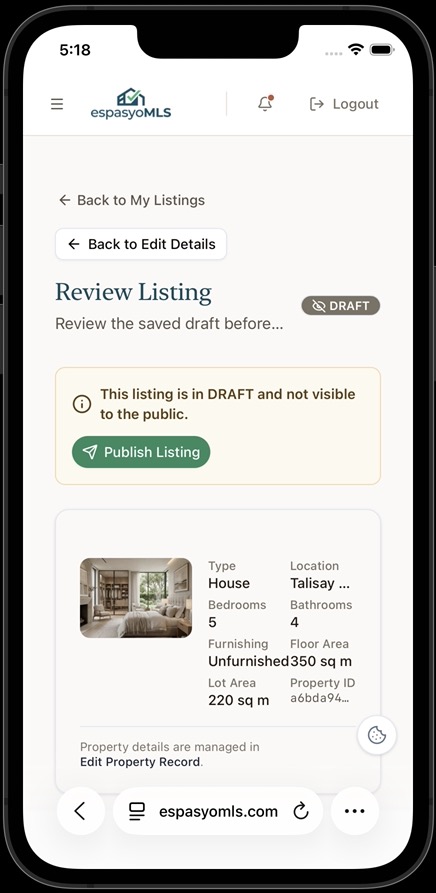
The Review Listing page shows your saved draft with its status marked DRAFT, not yet visible to the public. Check every detail, then tap Publish Listing. If you need to change anything first, use Back to Edit Details; your entries are retained.
Your listing is live
After publishing, the Manage Listing page shows the status ACTIVE, which means the listing is visible in search results. From here you can View Listing to see it as the public does, Mark as Sold when the deal closes, Reprice to update the price, or Delist to take it off the market. You can return to this page anytime from My Listings.